2014 CBBG Fall Basketry Retreat

This year I attended the Columbia Basin Basketry Guild‘s fall retreat at Camp Magruder, OR. I’ve been a member of the guild for 3 years now, but hadn’t yet made it out to the yearly retreat. A few months back the weavers in Eugene had me come down and show them how to prepare Himalayan Blackberry for weaving, and they convinced me (it didn’t take much convincing) to make the retreat a priority. Since I have to listen to my elders, I made sure to follow through!

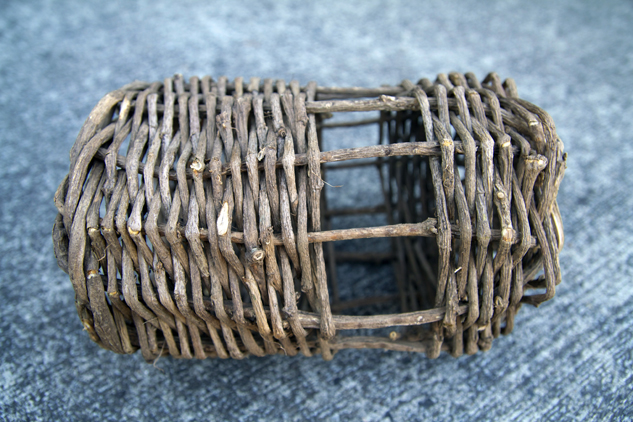
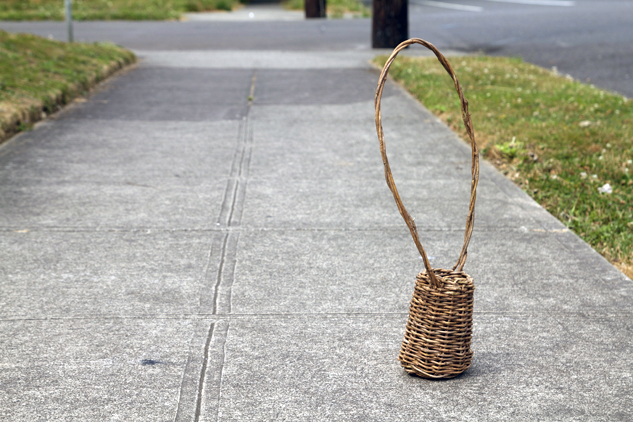
Flat Reed Adirondack Pack Basket
Flat Reed Adirondack-style pack basket. It looks bigger in this photo than it actually is. Kit and class by Jill Choate.

I took two classes while I was there, a small Adirondack pack basket taught by Jill Choate and a woven Goose class taught by Donna Sakamoto Crispin. I’ve splint basketry for a long time now, as I work mostly with English Ivy which is more conducive to wickerwork, but I really wanted to play around with it. Now I’m super hooked! I wasn’t able to stay for the Sunday demonstration of how to get splints from White Oak, and was super bummed about it. The Goose class was also really great. For a long time now I’ve wanted to learn to weave shapes so that I can weave little animals and figurines. I have a really good idea now for how to do that.

Reed and Cattail Leaf Woven Canada Goose
Canada Goose woven with reed and cattail leaves. Class taught by Donna Sakamoto Crispin.

It was great to meet a lot of new people, see old friends, and spend time with experienced weavers. As I delve deeper into the rabbit hole of basketry, this was definitely an inspiring trip. I can’t wait for the next one!

Thoughts on Death

I think about death all the time. Mostly because I am a hypochondriac. I often think about the possibility of contracting some disease or parasite or virus from my rewilding activities. I spend restless nights psyching myself out reading pseudo-medical websites. What if I died from Raccoon Roundworm after picking up a roadkill and skinning it? I can already hear what this fear-mongering, death-fearing culture would say, “He shouldn’t have been touching dead animals. Serves him right.” It reminds me of the “Grizzly Man” who risked his life to befriend the grizzlies, only to be killed and eaten by one, years later.

I’m not sure if he actually said this, but a friend told me that the grizzly man had said, “I would be honored to end up as bear shit.” While I wouldn’t be honored to end up in a coma because of raccoon roundworm, there is a certain honor in a life of risk-taking for a greater cause, or for a life lived outside of safety, security, and comfort. Living a freer, exciting life requires taking risks. Rewilding requires taking certain risks in order to live life more fully, more free. It requires letting go of your fears, and in particular, the fear of death.

I don’t want to die, but I am not afraid of being dead. I am more afraid of never really having lived a really awesome life, doing the most I can for the future generations. It’s not so much that I’m afraid of being dead, but that I really just don’t want to die. In spite of life’s hardships, I really enjoy living. The fear around death that I have is in the act of dying itself; will it hurt? For how long? I don’t think I’ll care much after that part anyway. Although, I’ve been up close and personal to animals that I have killed for food. I’ve seen the life leave their eyes. I’ve heard their last screams. I think that I may fear being dead if I was dying.

I used to think pretty highly of myself. Like, if I die, who is going to bring rewilding to the world? This is very silly, since anyone living 100 years from now who is alive, with be rewilding in some capacity whether I die now or 50 years from now makes little difference. My words and actions make little difference in the whole of the world. I can try to convince people, but the real convincer is mother nature, who will force people to rewild or die. Even then, the positive feedback loops of climate change could wipe us all out, rewilder or no. But it is certain that *if* people are alive in 100, 200 years, 1000 years it will be because they began to rewild.

I’m pretty sure I will die as the collapse intensifies, if I even live to see it (get worse than it already is). My immune system is weak. I have many maladies that will be difficult to deal with (such as having IBS and a lack of toilet paper). I don’t dwell on this thought much though, because the future is completely uncertain. I could die in a car accident tomorrow. I could have a heart attack in my sleep tonight. I could have a brain aneurism before I finish this senteeeee………

Just kidding! Still here.

What I want is an honorable death. For example: to be torn apart by a pack of wolves would be more honorable than being hit by a car in downtown Portland. To slip and fall off a cliff in the wilds while scouting, hunting, foraging, or planting seeds would be more honorable than accidentally electrocuting myself in the shower. I want a wild death. I don’t care if it is a stupid mistake, it is was for rewilding. Of course, I don’t *want* to make any stupid mistakes, but I would rather it be a stupid mistake on the path of rewilding, than a stupid mistake of a domesticated, civilized nature like forgetting to look both ways before I cross the street or choking on a burger at a fast food restaurant.

I believe when I die I will go in the ground. I do not believe that my mind will carry on in an afterlife. I think that all the information stored in my brain, all my memories, experiences will die with my lifeless body. The energy that makes my heart beat today will transform into something else, much like my decomposing flesh. I think it is foolish to live for an afterlife. This is why I do not want to die. I live for my life, this life. I will rewild until I die. If there is a spirit, then I’ll continue to rewild in the afterlife.

• • •

I would like my after death rituals and customs to be more wild. When I die, I would like my body buried in the ground, not burnt, not in a coffin, and without any gross fluids injected into it. I don’t want to be in a cemetery. I don’t want a headstone. I want a tree to be planted in my honor. Preferably an Oak tree. This tree can act as a headstone. If that is not possible, I would like a “sky burial”. I would like my body to be placed high atop a mountain and eaten by vultures. My possessions should be donated to a rewilding cause. Those are the only wishes I can think of should I die before I get the chance to revise this list.

Here’s to long, healthy, happy life!

• • •

Comments are disabled. To have a conversation about this post, please go to the rewild forum:

http://rewild.com/index.php?topic=1785.0

Deer Bone Fish Hook Earrings

fish-hook-earrings

Birthday present I made for my lady. Deer bone fish hook earrings with mussel shell lures tied on with elk sinew. Utilitarian jewelry ftw. My next batch will be more symmetrical I hope. And yes, her ear piercings are large enough to fit these. 

Brain-Tanned Nutria Pelt Bag

My brain-tanned nutria pelt murse. Case-skinned. Stitched the bum side with my bone awl and brain-tanned buckskin thong. The opening is where the face is, the shoulder strap is looped through the fore arm holes. Shoulder strap is a 5 strand braided chem-tan deer hide from scrap bins. I have only made one cut around the base, other than that the hide is in tact in case I want to use it later for a jacket or something.

nutria_pouch

A Bunch of Bifaces

bifaces

I’m not that great at flint-knapping. It’s one of my goals this year to be able to make nice arrowheads from a larger core of obsidian. At Echoes in Time this year I made a couple of handfuls of bifaces, a flat stone with one solid edge all the way around, created mostly through percussion flaking. These are basic tools in and of themselves, but they are refined through pressure flaking, which I’m still not great at with obsidian. I can do a glass bottle because they are relatively easy since they are a consistent width. The hard part of working obsidian is getting a consistent biface to then pressure flake. These were made from poor blanks and are fairly decent. I used a copper bopper for most of these but also played around with some light, rounded sandstone hammer stones. I feel like I’m finally getting a knack for knapping.

English Ivy Shrinkage in Green Weaving

When weaving with green ivy, I always weave it super tight. Still, like any weaving material, as green ivy dries it shrinks a lot. The basket above is an example of just how much shrinkage occurs. I rapped all the ivy down in a random spot to show how much space is left open. When I finished weaving this basket it was so tight that you could not see light shine through it. After a week or so drying indoors during the summer, it’s shrunk down leaving a gap of about 1/4 the entire basket. This is why I call these “survival baskets”. They are something you can fashion together rather quickly, but are not sturdy in the long run. To make them last longer, you can simply rap the weavers down as I have done in this pic and then add more green ivy in the space, weaving the same way.

To avoid this problem altogether I recommend drying out ivy under it is bone dry and then re-hydrating it for a few hours before weaving with it. It is difficult to mellow it because it dries back out so quickly. It is hollow at this age and doesn’t have much density to hold moisture. You do want to mellow it for a little while though, especially if you over soak it and the bark is slipping a lot.

This is an interesting basket because it was also my first experiment with a style of weaving called randing. I’ve never thought you could really rand with ivy because it is so floppy. I have done randing with willows, but they are nice and firm and lock in place. The ivy randing worked really well though, it just needed a little more attention. The randed section is on the left. Rather than weave with one, two, three or four weavers there is a weaver placed between each spoke and then they are woven up all at the same time. You can see the diagonal pattern that it leaves if you look closely at the left side versus the right. It’s kind of hard to tell in this picture.

Wet-Scraping Nutria Hides With Bone and Stone Tools

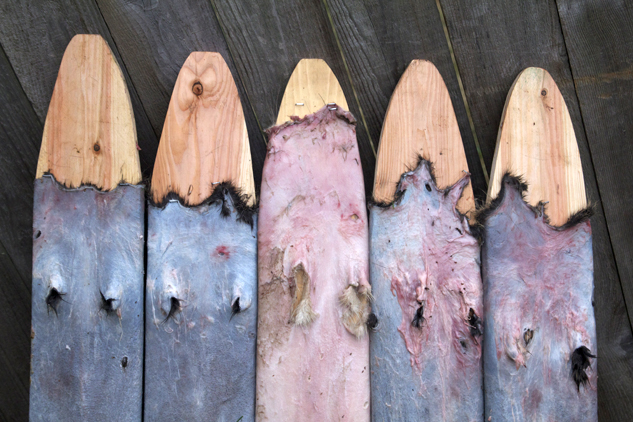
Hide_Boards

So, I have a friend who has property and it is over-run with nutria. About three times a year he will go around and shoot as many nutria as he can see. This may seem cold, but nutria are an invasive species of aquatic rodent brought here during the fur trade era and released when it crashed. They have a native relative, the muskrat. Unfortunately for the muskrat, the nutria breeds three times a year as opposed to the muskrat’s once a year. They have been taking over muskrat habitat and doing a lot of damage, even moreso than the beaver, who can cut down entire trees with its teeth. So, yeah. In the spirit of my work with Rewild Portland, doing ancestral skills with invasive species like English Ivy and Himalayan Blackberry, it was only a matter of time before we made the leap to mammals. Nutria is the most obvious starting place there.

I’ve had 11 hides in the freezer for a couple months after the last batch of my friends nutria killing spree. The summer is the best time to tan hides because of the heat, so I figured it was now or never! I made a few hide boards since it seems like a heck of a lot less work than racking all 11 hides. It seems to be working well. I used this old trapper’s guide to make the boards. I’ve tanned hides before, but not nutria. To freshen my memory and get some tips I read up on my old friend Sassmouth’s blog on nutria tanning. We case skinned the nutria but didn’t keep the faces on most of them, so I had to staple the hides at the top while scraping them. In the future I think I will definitely save the faces, when I got this last batch I didn’t have time to do the delicate work on skinning the face so I just cut their heads off.

Here are the tools I was using to scrape the flesh, fat, and what I could of the membrane. There is a deer leg adz on the top (made from a metacarpal which is displayed on the left). This adz is rounded and dull. It works amazing in the spots the drawknife just can seem to peel. An elk metacarpal split down the center for a drawknife is on the bottom. This tool does the meat of the work (pun intended). In the middle are three basalt flakes from the Columnar Basalt that I am smitten with at the moment. These are for scraping even harder to scrape pieces that the bones won’t take. I pressure flaked a serrated edge on a couple of them to cut off the tough stringy bits of membrane and flesh. I tried these tools for a bit and then switched to a metal drawknife. I quickly went back to the “primitive” tools when the drawknife tore through the flesh in a couple spots. It was just too hard of a tool. The bone and stone tools worked much better so I did the rest with them.

tools

Here are some photos of me working the hide. I would normally do a pipe or log for wet-scrape, but this flat edge on the bone worked well on this flat board. I also am not a fan of this particular set up. I wish the boards were longer so that I could stand. I prefer this position of fleshing rather than the pushing away method. I forget what they are called at the moment.

peter_1

peter_2

peter_3

After the first hide I figured out the best way of going about getting a clean scrape. I would start with the adz and delicately peel away a nice layer all the way around and all the way to the hide and then switch to the drawknife for the rest, except for those tough spots which I used my adz and basalt tools.

scraping

Sometimes that membrane around the face or the chest/arms just doesn’t want to come off. Here is an example of what it can look like. The middle is just glued in there! This one was the one my friend Kelila was working on, so maybe it was just her. Zing!

chest_bad

Here is what it should look more like:

chest_good

Sometimes you find treasures in the flesh… Here are two bullets that I pulled from the same animal. I hope they had a swift end and I am thankful to use their skins.

bullets

Never work on hides alone! It’s always more fun with friends. Here is Kelila making a funny face as she tries to remove the sticky membrane from the front.

Kelila_2

The slugs already started helping me clean up all the fleshy bits in my yard!

slug

Half way done!

hides

My Very First English Ivy Basket

This was the first ivy basket I made a few years ago (2009). It was a simple woven basket using only one weaver. No twining. It was roughly constructed. I gave it away to the forest up in Twisp, WA when I was at Lynx’s program.

Bow-Drill Busking @ Last Thursday

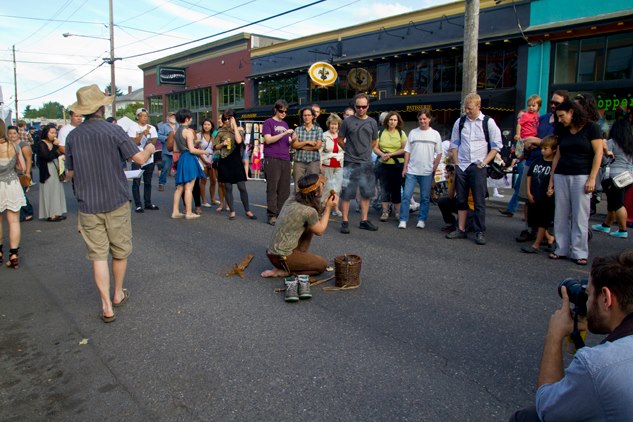
I’ve been lighting bow-drills on the streets of Portland for 15 years now. It’s still fun, but man were my arms tired!

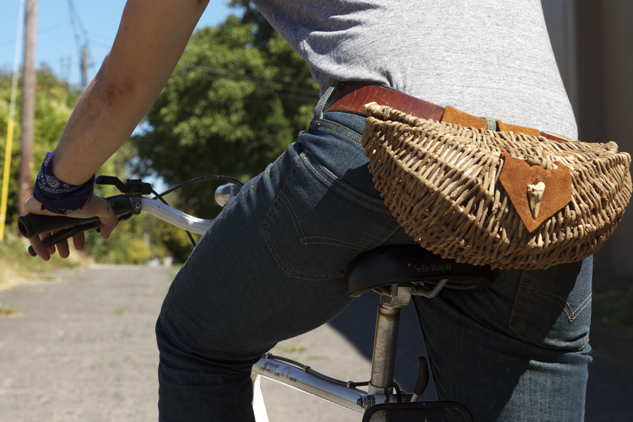
English Ivy Fanny Pack

IMG_0129

One of my more recent projects: The English Ivy basket-fanny pack. Tapestry weave. Chem tanned leather scrap for the front flap and belt loops. Deer toe bone for the button.

Making Stone Flakes From a Columnar Basalt Core

core_hammerstone

For a while now I’ve been playing around with making tools from hard stone. I’m not a great knapper. I’m not really even a good one. I’m a novice when it comes to making beautiful arrowheads and knives. I can make functional arrowheads, and functional knives from obsidian or even glass bottles. My concern has always been… what good is glassy obsidian for doing, well, real things? I mean, sure if you want to skin an animal obsidian makes perfect razor blades for the job. If you want to carve a bow-drill notch, or score a bone, or saw through a willow shoot, Obsidian is not going to cut it.

So during the spring I was on a hike with my lady along a river and I saw a stone that was broken and shaped similarly to obsidian, but was a dull gray/brown. It was a piece of columnar basalt. I took it home and played with making flakes using another large stone (granite? a larger grain basalt?) as a hammer stone and it was amazing. I’ve been making a bunch of flakes and even pressure flaking a little bit to get a sort of serrated edge. This stone is tough. Super hard. I’ve been asking around to the old knappers every chance I get for tips on working it. Most have suggested I find a softer basalt but a few have given me some really nice pointers that I’ll share in a later post once I’ve tried them out myself. I’ve collected quite a bit up there to play with back at home.

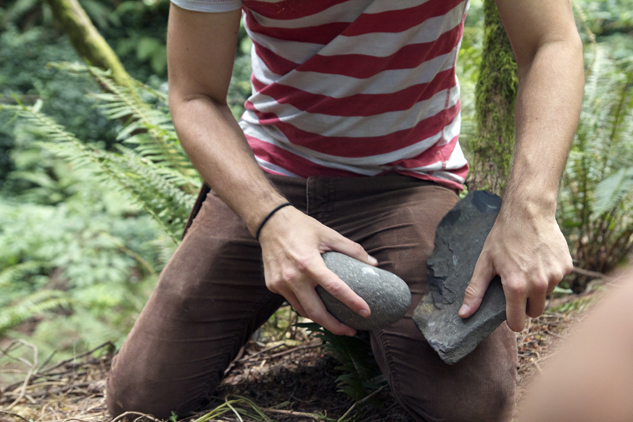
Here are some photos of me demonstrating how to get quality flakes for scraping tools. These are from the Teen Wilderness Skills camp I co-led for a Rewild Portland and Portland Parks and Recreation partnership.

explaining

stricking

flakes 1

stone_flakes

pressure_flaking

serrated_edge

English Ivy Quickie “Survival” Basket

IMG_9787

Quickie “survival” basket I made today in an hour or so at the Teen Wilderness Skills camp, a partnership between Rewild Portland and Portland Parks – Teen Environmental Adventures. Would have taken maybe 20 more minutes if I pulled the ivy myself. Simple weaving, no twining. I call these “survival” baskets because none of the materials are cured. This means that as it dries out they will shrink and its structure will become loose and compromised. It could still work for a long time, but not as long as one made with cured materials.